CLICK HERE FOR FREE BLOGGER TEMPLATES, LINK BUTTONS AND MORE! »

Monday, June 27, 2011

Jaylyn's Turning One

I had to share...

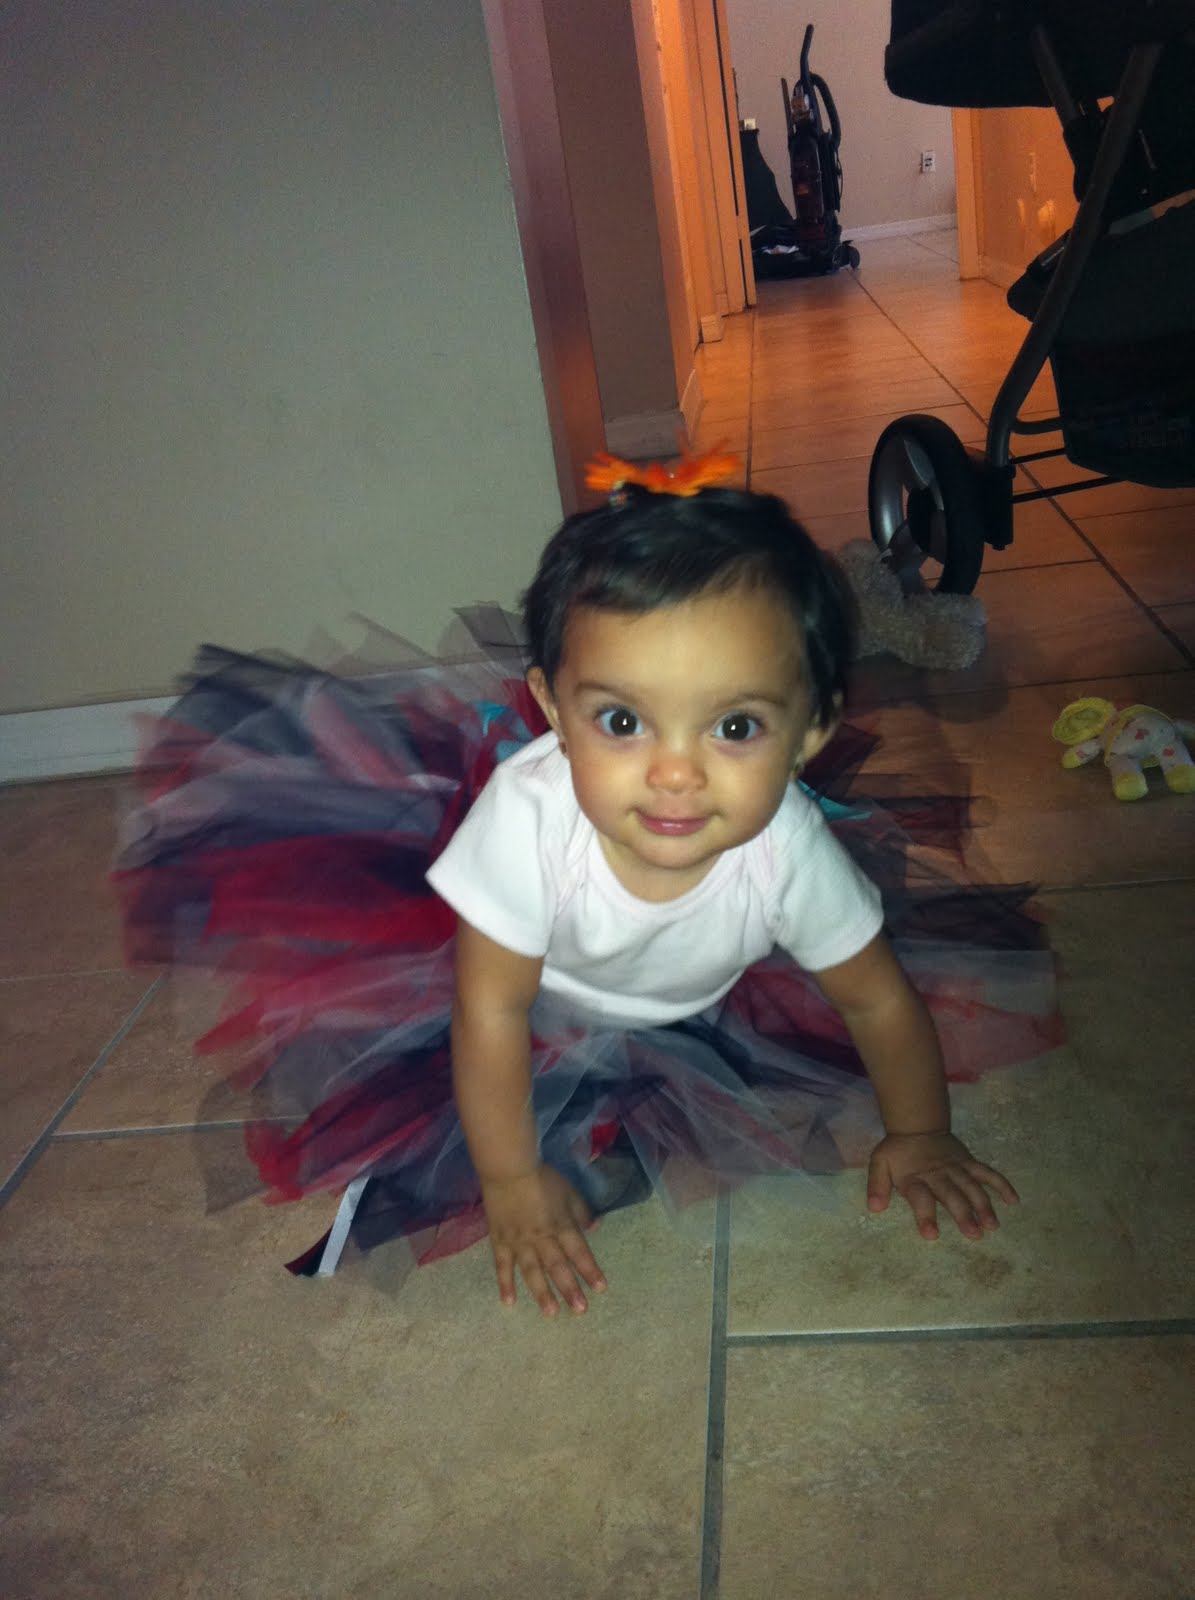
I made little Miss Jaylyn another tutu this weekend. And, of course, its perfect! I’m seriously going on a tutu making rampage...lol. This one is for her first birthday. It has the same colors as her bathing suit (courtesy of Nanny) and all her birthday decorations (courtesy of mom - ME!). I can’t wait...

>


Look at her bathing suit!! It's just adorable. My mom crocheted it for her.


...and her party hats. It's a simple template I found on-line (google - party hat template) with a touch of me and alot of help from my Cricut and the Create a Critter Cartridge. So much cuter than any party hat at the party store!


here is her birthday banner


and her invites...

Tuesday, June 21, 2011

Felt Rose Headbands

I have all sorts of pretty, girly, headbands for Jaylyn and I’ve put all of them on her. I just think they’re soooo cute. I’ve made her crochet ones and bought her all sorts of soft stretchy ones. She keeps NONE on her head. Jaylyn thinks headbands are more fun worn as necklaces. My favorite ::insert sarcasm:: is when I grab them from in her playpen and they are cold and slobbery!! Yuck, yuck, yuckedy, yuck! Don’t ask me what made me think that these would be any different; but they’re sooo stinkin’ cute and fun to make, so I made them anyway!


Monday, June 20, 2011

No Sew Tutu's

Why didn’t I think of this before?! This weekend my girlfriend, Sharon, came over with her little one, like she does most weekends, and all she kept talking about was these tutu’s. I have to admit I didn’t really care to much at first (bad friend, me) until she showed me them on-line. OH MY GOODNESS, they are soooo incredibly easy to make!! AND so darn cute! I've never purchased a tutu and I never will! :)

Just google “no sew tutu tutorial” and a zillion will pop up. It’s that easy to find instructions.

My favorite part of the whole thing is how cheap we were able to find tulle. Seventy-five cents a yard, WHAT!! Can’t beat that.

Here’s the best I can do at giving you some sort of a quick place to start.

Supply:
1. Thick ribbon (your choice in color)
2. Tulle (about 2 yards per tutu and color) **when you buy the tulle have the lady cut it in ONE yard lengths, it’ll make it easier when you cut the strips**
3. Scissors

Instructions:
- Measure your little one’s waist with the ribbon your using and times that by 3. If the little miss measures 20 inches around then you’ll need 60 inches of ribbon.
- Then, tie knots 1/3 of the way in on your ribbon from both ends. The space in-between both knots is where you’ll tie all the tulle.
- The “left over ribbon” on the ends is what you’ll use to tie the tutu around the little miss’ waist.
- Fold each yard of tulle in half and roll it up like you would a piece of paper. This is the easiest way to cut your strips.
- Cut the ends off the roll, about a ½ inch or so, to get the ends as even as possible.
- Cut the rest of the roll into smaller rolls of about 3 inches a piece.
- Once your done cutting, unroll each of them, fold and cut each strip in half (long ways) and your ready to start tying.
- Fold your strips in half again making an arch, or loop. Hold that loop to your ribbon and slip the ends through the loop and pull. Now you have a knot. Continue like this until you fill the ribbon from knot to knot with tulle.

The more tulle you tie, the fluffier your tutu!! You can add as many colors as you want. You can also tie fun ribbon to it. The possibilities are endless. Enjoy!

The tutu I made for my wittle girl is red, white, and blue. She’s going to look sooo cute when she sports it this 4th of July.

I also made her a matching stretchy headband. Same concept, just shorter strips of tulle. Use your scrap pieces. I’m in love!


Tuesday, May 31, 2011

Sweet Smile

My son has the sweetest smile I've ever seen. His face lights up every time and his gorgeous dimples are to die for! I have sooooo many pictures of him smiling, he's always smiling, and I thought it would be perfect to make a page for his album with a few different pictures of his smile. Here it is...


Not to mention, I really wanted to use My Mind's Eye, Alphabet Soup (the boys line). The paper is so fun and simple! I love My Mind's Eye!!


For this layout, I used 3 different pictures of my son and cut them down as fit to make them, together, one 5x7.


I drew the hot air balloons on the paper and cut them out, pieced them together with pop up foamies and some bakers twine, used a button from Papertrey Ink on the smaller one as the basket, and voala!! Sooo stinkin' cute! :)


The banner I also cut myself. It's basically 1.5 inch thick strips of patterned paper cut to different lengths. For the tip, I lightly folded the strips in half, being very careful to not crease the paper to much, and cut at an angle like you would the tips of ribbon. I added the bakers twine along the top and continued it randomly on the page. I love the final result!

Thursday, May 26, 2011

Whoo Loves You?

My Mind's Eye paper is amazing. I don't think I've come accross a line by them that I don't like.

You know, the other day, as I was organizing my stash of paper I realized something that made me smile. Most of the paper I was looking through has been sitting for quite some time; my scrap booking took a vacation for a minute. Anyway, what I was looking through dates back as far as when I first started scrap booking, like 5 years back, and back then I had no idea how many different companies are out there, I simply picked out papers I liked. Little did I know, I was picking out mostly the same few companies, My Mind's Eye being one of them. Now I know better; now I know to look for you! :)

This mini is for my mom. It spells out "Nanny" which is what my kids and niece call her; she refuses to be called grandma or abuela! It holds pictures of her grand babies. Of course, I wanted to keep it once I had the finished product in my hand :).

handmade flower

journaling tag


I made this little girl's skirt with a piece of pretty ribbon I had, kind of scrunched it up, sewed the top together so it looks like a skirt, glued it to the girl with fabri tac, and attached a little piece of twine from Papertrey Ink tied into a bow to the corner making it look like its part of the skirt! Super cute!


my favorite pages in the whole book! "Who Loves You?" The little owl was pretty simple to make. I got this idea from Elizabeth Kartchner's blog. Check them out! She made little stuffed owls with some real cute fabric, well, I thought they'd make great embelishments, AND I was right :). They are about 2.5x3 inches and really super fun to make.


just a few pictures of the kids.


The end. Enjoy!

Monday, May 23, 2011

Good Morning

Finally, a scrapbook page for Jaylyn’s book. She’s going to be one in 2 months and I have all of like 3 pages in her scrapbook, bad mommy!


This page, to me, is so soft and sweet. It’s actually a great reflection of what my baby girl is, soft and sweet. Everything is mounted on Bazzill Basics Paper, French Vanilla Cardstock. I used My Mind’s Eye, Lost & Found, for all the embellishments. The little girl stamp with the heart balloons and the blue hearts are by Prima. Simply adorable!


The Lost & Found papers I used were actually given to me by my friend Heather in a pile of scraps she didn't want anymore or had already used. How perfect did that work out. :)


Supply:
My Mind's Eyes, Lost & Found; Bazzill Basics Paper, French Vanilla Cardstock; Prima Clear Stamps, J&J Up Up and Away, Twine from Papertrey Ink

Thursday, May 19, 2011

School Days


Yesterday, while looking through October Afternoon's site, I came across a project that one of their design team members, Kinsey Wilson, made. She made an expandable folder to keep all her old report cards, school work, and stuff she kept from her school days. I thought, what an awesome idea. My son is finishing up his VPK career and I have his school work everywhere. I knew I didn't want to trash them but I didn't know what to do with them until I saw her folder. Sooo, last night I went to town on some green Smead file folders I "borrowed" from work..lol. Enjoy!

Supply:
Smead file folders (3), eyelets, dcwv grade school paper stack, kraft paper, ribbon, twine, pop up foams, cat's eyes chalks, circle punches (small, medium, & large)


October Afternoon's Site
Kinsey Wilson's Blog

Wednesday, May 18, 2011

My munchkins

She is the sweetest baby I have ever met and I love her for it. She is happy and curious and for being such a teeny being, she has captured my entire heart. She savors every hug and kiss she gets and that totally melts my heart; she is my "sucker for love".
..SHE IS MY GIRL..

He is my learning experience, the first boy to truly hold my heart, the only boy I will always need in my life, a pain in my butt, gorgeous, funny, noisy, hyper, exhausting, very opinionated, smart, kind, I can go on forever and ever about him
..HE IS MY BOY..

More Party Fun..


Moving along with little Miss Jaylyn's first birthday goodies :) After shopping around for various events, baby showers and birthdays, I know that what's out there, as far as decor goes, isn't very cute! Especially party hats...blah! Also, I want all the decorations to match and coordinate without having to settle for what the stores sell. This is why I chose to make everything; not to mention how much I enjoy making everything. I complain every step of the way, "omg, this is going to take forever" or "next time I'm buying stuff" but the final product makes it all worth my while. Sooooo here is one of the party hats for Jaylyn's birthday. This cute little crab one is for the boys. There will also be whales, squids, fish, and octopuses amongst other baby sea creatures. And, each hat has a hand made pom pom attached at the top. Soo cutie! Oh, in case you haven't already guessed, party theme is baby sea animals and the birthday girl is a baby mermaid. :))
Supply:
kraft paper, party hat template (google it), cricut's create a critter cartridge, red dcwv cardstock, black dcwv cardstock, twine, cat's eyes chalk, glue dots, white yarn for pom pom

Jaylyn's turning oNe...


My baby girl is two short months away from turning one! Yay!! Actually, not so much, this only means she's getting big and I don't like big. I want her to stay just the way she is now; greedy mommy.
Anyway, I've started working on all her party decorations and favors and this is what I've made for her invitations...I absolutely love them!
Supply:
kraft paper cut to 4.25 x 5.5 inches, cricut's create a critter cartridge, lavender cardstock, peach cardstock, off white cardstock, cat's eyes chalks, glue dots
..ENJOY..